After 4 successful creations, I was feeling a lot more confident and for my next project I decided to do something a bit different. Bea Broadwood at Petite Properties is on Facebook and posts her new designs. I was in bed sipping my morning tea and scrolling through my Facebook feed when I spied The Watchtower!
Now, I should explain that we are HUGE Game of Thrones fans. We love it! You can always tell when it's on due to us all being in the front room oohing and ahhing at the latest twists and turns -we don't usually like the same TV as I like antiques programmes (I've fully embraced middle age) and Charlie likes survival shows (he hasn't)-. I saw The Watchtower and I immediately thought, Castle Black! I had visions of a mini John Snow prowling the mess room and The Lord Commander in his quarters with Pyp and Grenn in the armoury. I went to the PP website and bought it immediately!
It arrived, complete with instructions for the basic construction and it seemed really complicated! It had so many little bits, and none of the finishing instructions I'd been so used to. I read through the instructions twice relating them to all the parts and even after that, it still seemed a little daunting. It wasn't so much the construction of the house, but the finishing....I needed a more detailed plan. In the show, Castle black is stone built and the interiors were also stone or plain drab wood, very utilitarian.
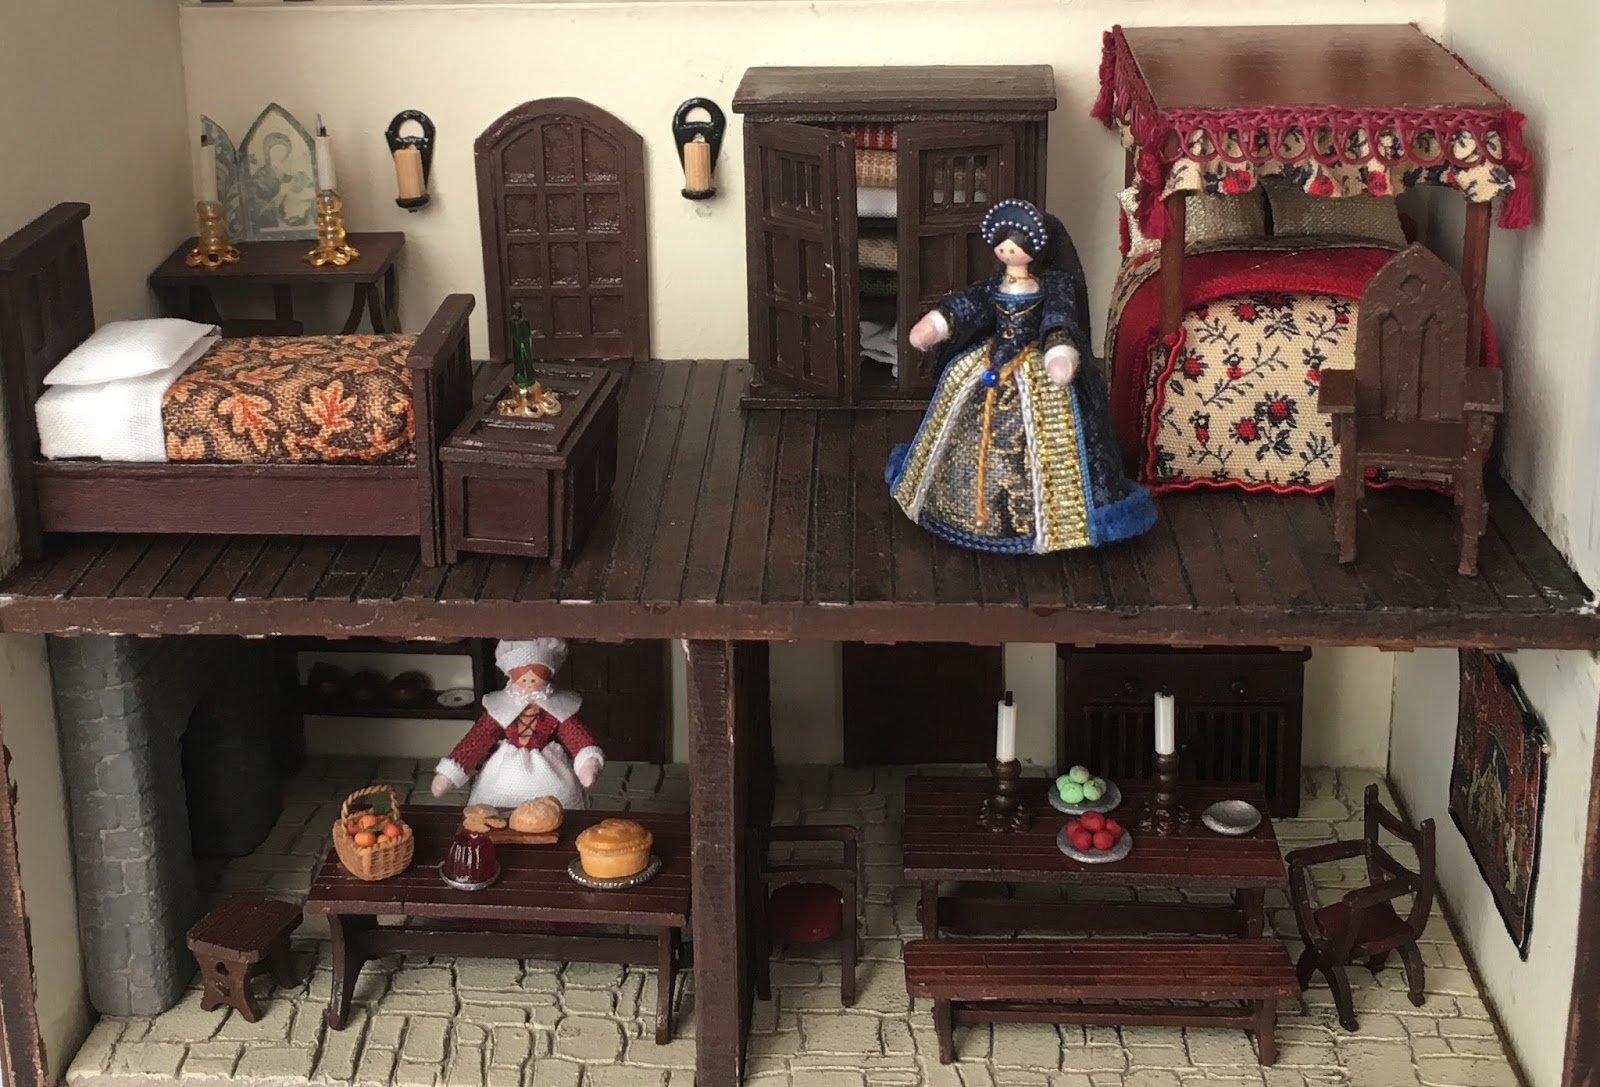
I decided that I would do a stone walled armoury on the ground floor and the mess hall on the first floor, Maester Aamon's library on the second floor would be wood panelled with floor to ceiling bookcases and finally, the Lord Commander's chamber would be at the top.
So, I had my plan! I then went through the instructions annotating when I would do when so I had my own step by step instructions.
 The first issue I faced was the claywork. I'm pretty confident with external claywork, but my plan involved internal claywork too. The first thing I did was a mock construction, carefully marking off all the areas that needed to be kept clear for windows and stairways etc. I repeated this throughout the build to make sure it would all fit together at the end. Then I just got stuck in, handscribing as I went. I did the whole interior in one sitting so as to keep it consistent. The wood panelling was constructed out of cereal packet strips and heavily dirtied. All the floors and ceilings were similarly constructed. Then it was just a case of following Bea’s instructions to construct the first 3 floors. To finish. I dry brushed the edges with a little white paint to age it up.


 Next was the colossal job of the exterior claywork (pardon the use of colossal in small scale work, but that’s how it felt). The first thing I did was another mock construction as there were bits I had to keep clear for windows etc. I did a wall at a time but it still took ages to scribe the clay. I was so pleased with the results.
I decided that I would do a stone walled armoury on the ground floor and the mess hall on the first floor, Maester Aamon's library on the second floor would be wood panelled with floor to ceiling bookcases and finally, the Lord Commander's chamber would be at the top.
So, I had my plan! I then went through the instructions annotating when I would do when so I had my own step by step instructions.


 |
| At each point in the build I made sure the pieces still fit! |
 |
| It all fitted together! |
 Next was the colossal job of the exterior claywork (pardon the use of colossal in small scale work, but that’s how it felt). The first thing I did was another mock construction as there were bits I had to keep clear for windows etc. I did a wall at a time but it still took ages to scribe the clay. I was so pleased with the results.
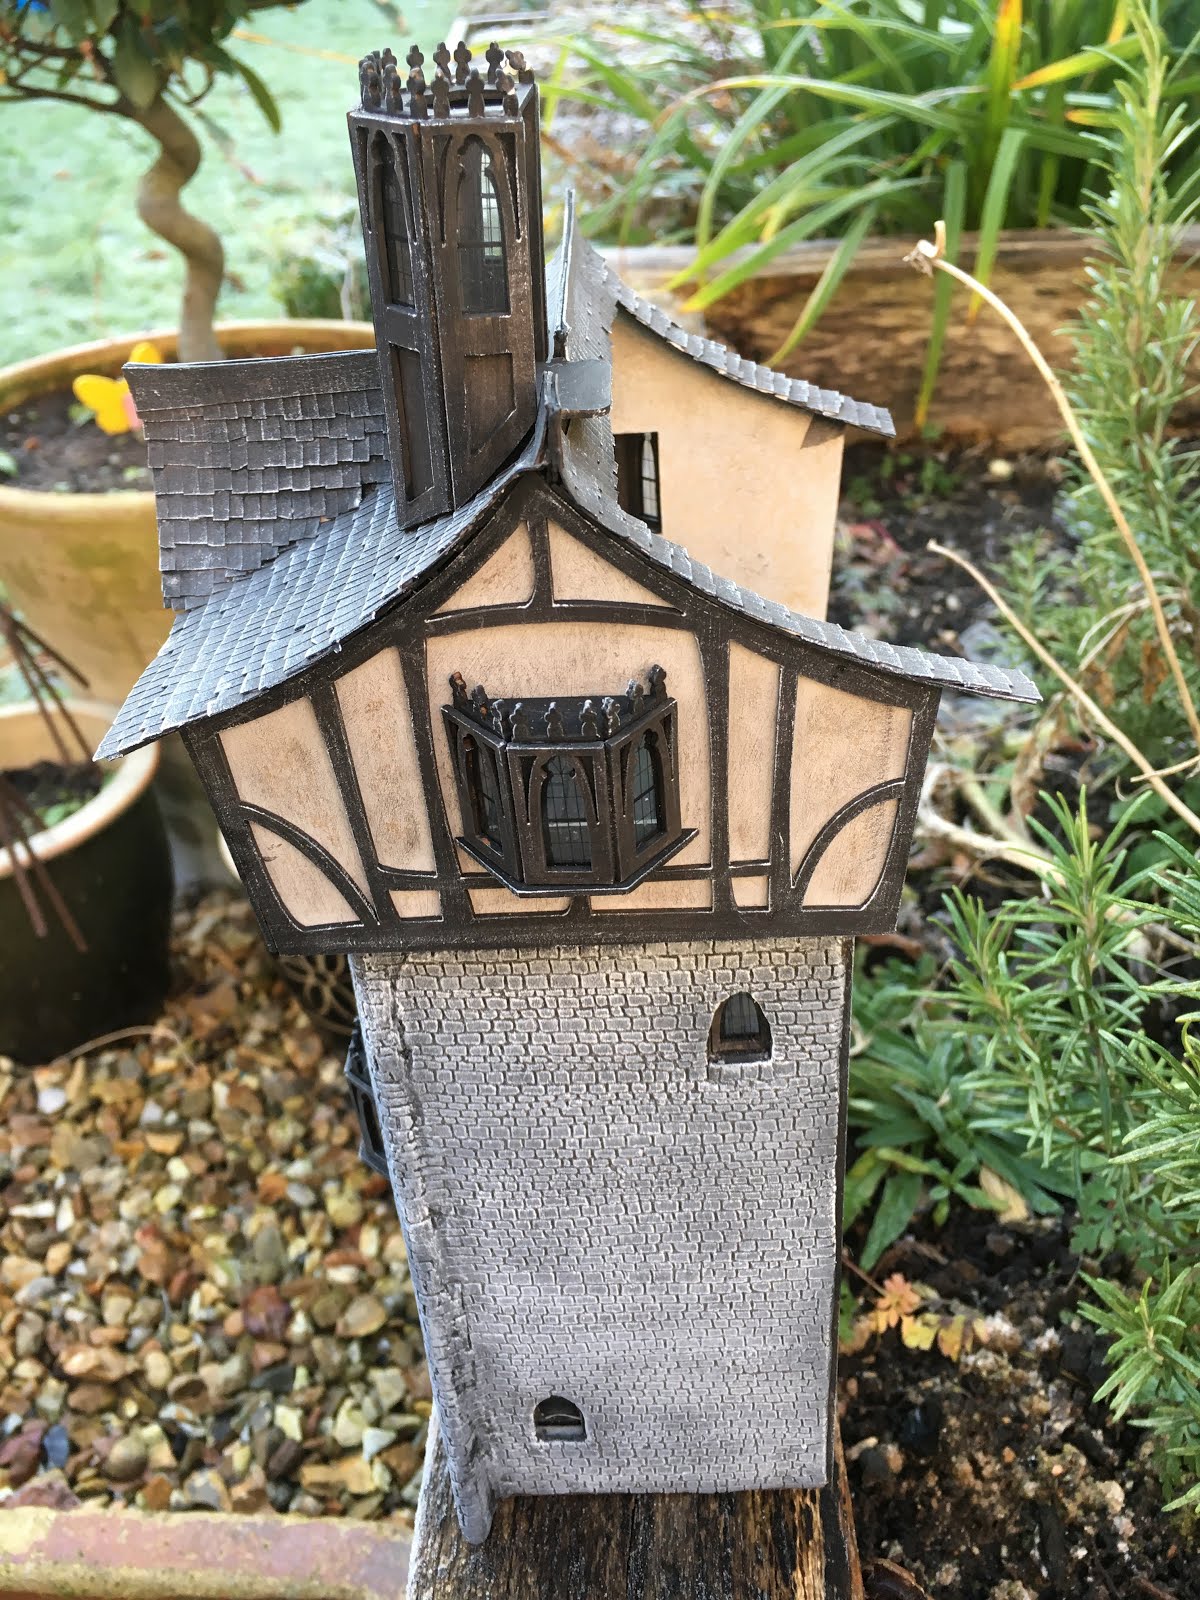
But, disaster struck as it started to dry it also began shrinking, and cracking. Despite all my efforts, all I could do was watch as my lovely stonework cracked and flaked. I should explain that to do the outside I’d had to buy another block of clay. It seemed the usual good quality but was definitely wetter than previous blocks and that was obviously the issue. I now had two choices, scrape off and start again, or repair. I went for the later.
 I pasted clay into the cracks and cut strips to counter the shrinking. One big issue was that the windows didn't line up anymore. So I had to gentle scrape the clay from the insides of the windows until it all lined up again and then fill the gaps. It was certainly a lot less pristine than previous efforts, but actually, that wasn’t such a bad thing and gave a bit more authenticity to the crumbling ancient stonework. That’s my spin on it at any rate 😀.
After all that, it was time to paint it. I decided not to go for any moss or vegetation as it's very cold at The Wall and I wanted to create a bleak menacing feel to the place. Instead I went for dark foreboding greys. I really took my time with the dry brushing creating layer upon layer of greys and finished it off with a dry brushing of white to age it up.

 Then it was on to the roof of the tower, this was not in MDF but in thick card and boy was it fiddlely to put together. It was worth it though as the wonky walls really give the design a touch of authenticity. The decoration was a lot simpler though as there was no stonework, I just painted it a light grey and then dry brushed on the muddy paint. The floor was the same plan boards as I used in the lower floors. I cut my own roof tile strips by eye and tried to recreate a hand cut wood tile effect. When finished, I painted the whole roof top in black, sponged on some dark brown and finished by distressing with white. I was really please with the finished product.
So there it is, by far my most difficult project but I had been well prepared by my previous projects.
Next time, I furnish Castle Black which includes making some medieval weapons...gulp!


